

Why You’ll Love This Red Velvet Cake
Need a show-stopping dessert that’s surprisingly easy to whip up? This red velvet cake is your answer! It’s rich, moist, and beautifully vibrant, perfect for any occasion from birthdays to cozy family dinners. The cream cheese frosting adds a tangy sweetness that perfectly balances the cake’s flavors. Trust me, once you serve this, everyone will be asking for seconds—and the recipe! You may also find Best Red Velvet Oreo Cheesecake useful.
The Only Red Velvet Cake Recipe You Need
Growing up, my favorite dessert was a moist slice of red velvet cake layered with luscious cream cheese frosting. The deep red color always felt festive, regardless of the season. With this recipe, you won’t just make a cake; you will create memories that last a lifetime. You may also find Red Velvet Cake With Cream Cheese Frosting useful.
Why This Recipe Works
- Quick Prep: With just a few simple steps, you can have a delicious cake ready to bake.
- Family-Approved: This cake pleases even the pickiest eaters!
- Beginner-Friendly: Perfect for those new to baking; you can’t go wrong with this method.
- Flavor Balance: The tanginess of the cream cheese frosting contrasts beautifully with the sweet cake.
This version stands out with its tender crumb and vibrant red color, enhanced by the use of high-quality cocoa powder and fresh ingredients. You may also find Red Velvet Christmas Wreath Cake useful.
Ingredients

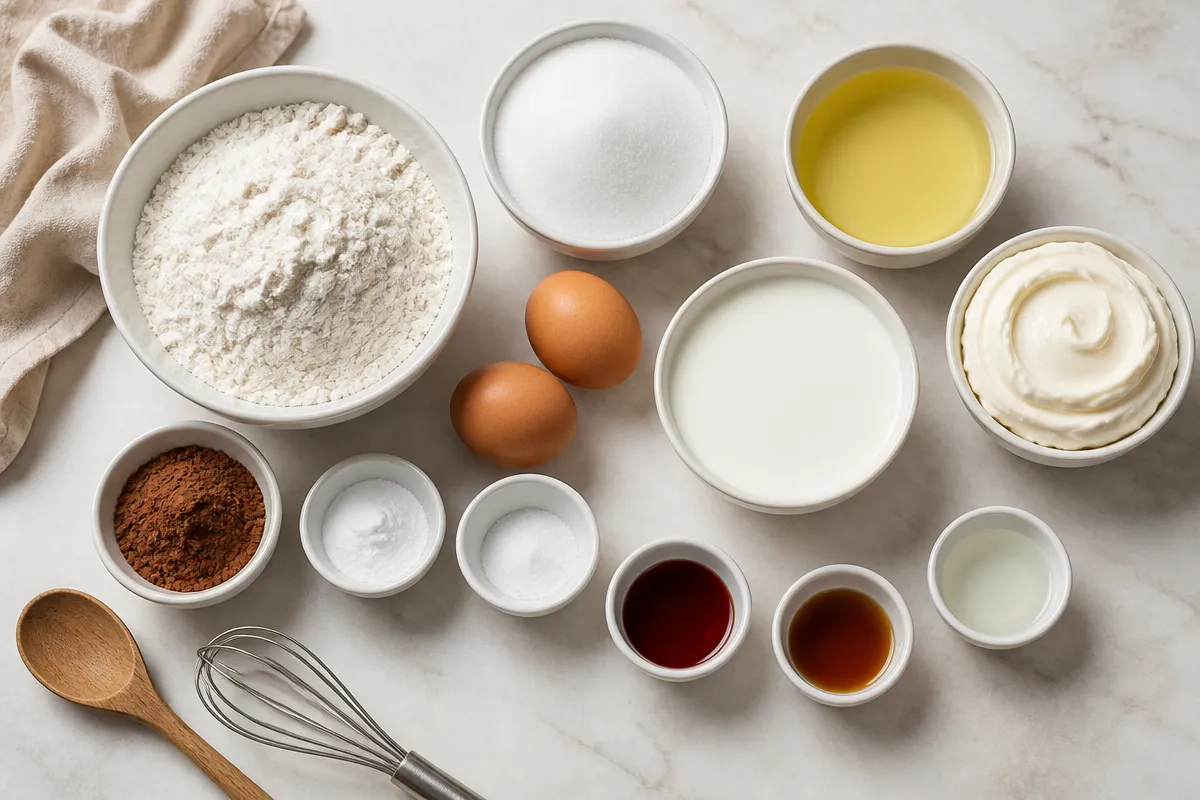
- 2 1/2 cups all-purpose flour
- 1 1/2 cups granulated sugar
- 1 tsp baking soda
- 1 tsp salt
- 1 tsp cocoa powder
- 1 1/2 cups vegetable oil
- 1 cup buttermilk, room temperature
- 2 large eggs, room temperature
- 2 tbsp red food coloring
- 1 tsp vanilla extract
- 1 tsp white vinegar
- Cream cheese frosting for topping
When selecting ingredients, opt for high-quality cocoa powder for the best flavor. If you have dietary restrictions, you can use gluten-free flour or dairy-free butter for the frosting.
Step-by-Step Directions
-
Preheat the Oven: Begin by preheating your oven to 350°F (175°C). Greasing and flouring two 9-inch round cake pans will ensure your cakes come out easily.
-
Combine Dry Ingredients: In a large mixing bowl, sift together the all-purpose flour, sugar, baking soda, salt, and cocoa powder. This creates a uniform dry mix and helps prevent lumps.
-
Mix Wet Ingredients: In another bowl, whisk together the vegetable oil, buttermilk, eggs, red food coloring, vanilla extract, and white vinegar. You’ll want a smooth, even consistency without any lumps.
-
Combine Mixtures: Gradually add the wet ingredients to the dry ones, mixing until just combined. Be careful not to overmix; folding in gently will keep your cake fluffy.
-
Divide the Batter: Pour the batter evenly into the prepared cake pans. The batter should be vibrant in color and slightly thick.
-
Bake: Place the pans on the middle rack and bake for 25-30 minutes. When a toothpick inserted into the center comes out clean, they’re done—avoid baking too long to keep them moist.
-
Cool Cakes: Allow them to cool in the pans for about 10 minutes, then transfer the cakes to wire racks to cool completely. This step helps maintain their good texture.
-
Frost and Serve: Once cooled, apply a generous layer of cream cheese frosting on top of one cake and place the other on top. Finish with frosting the sides for an elegant finish.
Serving Suggestions
This red velvet cake is perfect for special occasions. Try serving it with a fresh berry compote on the side for added color and flavor. For a festive touch, garnish with edible glitter or cocoa powder on top. It’s excellent during holidays, birthdays, or even as a sweet treat on a casual day.
Storage and Reheating
This cake can be stored in an airtight container in the refrigerator for up to 5 days. If you want to freeze it, wrap slices in plastic wrap and store in a freezer bag for up to 3 months. To thaw, leave it in the fridge overnight and enjoy at room temperature for the best texture.
Pro Tips
- Add a Flavor Boost: Consider adding a teaspoon of almond extract along with the vanilla for a deeper flavor.
- Avoid Dry Cake: Make sure to measure your flour correctly. Spoon it into the measuring cup rather than scooping, which can compact it and lead to a dry cake.
- Up Your Frosting Game: Use full-fat cream cheese for an ultra-luscious frosting that’s easier to spread.
- Time-Saving Tip: Bake the cakes a day ahead and let them chill; they’re easier to frost when cold.
- Stay Colorful: If you notice the red color fading, use gel food coloring, as it holds up better during baking.
Variations
Spicy Version
Add a pinch of cinnamon or nutmeg to the dry ingredients for a warm spice contrast; perfect for fall gatherings.
Lighter and Healthier Version
Replace half the vegetable oil with unsweetened applesauce to cut calories; this will keep your cake moist while adding natural sweetness.
Vegetarian or Vegan Version
For a vegan twist, substitute the eggs with flaxseed meal mixed with water and use plant-based milk and vegan cream cheese for the frosting.
FAQ
Q: Can I make the cake ahead of time?
A: Yes! The cake can be baked 1-2 days ahead, wrapped, and stored in the fridge until ready to frost and serve.
Q: How do I fix a dry cake?
A: If your cake turns out dry, make sure to measure your flour accurately and don’t overbake it.
Q: What’s the best substitution for buttermilk?
A: You can use a mixture of milk and vinegar as a buttermilk substitute. Just add 1 tablespoon of vinegar to a cup of milk and let it sit for 5 minutes.
Q: How long does the cake keep?
A: The red velvet cake can be kept in the fridge for 5 days and freezes well for up to 3 months.
Q: Do I need to level the cake layers?
A: It’s a good idea to level your cake layers for even stacking, especially if they have domed tops.
Conclusion
This red velvet cake is not just a treat; it’s a centerpiece for any occasion. For additional tips and techniques on making a fantastic red velvet cake, you can explore Sally’s Baking for expert advice. Additionally, you can find alternative recipes at RecipeTin Eats that might inspire your next baking adventure. Enjoy crafting your own delicious version!