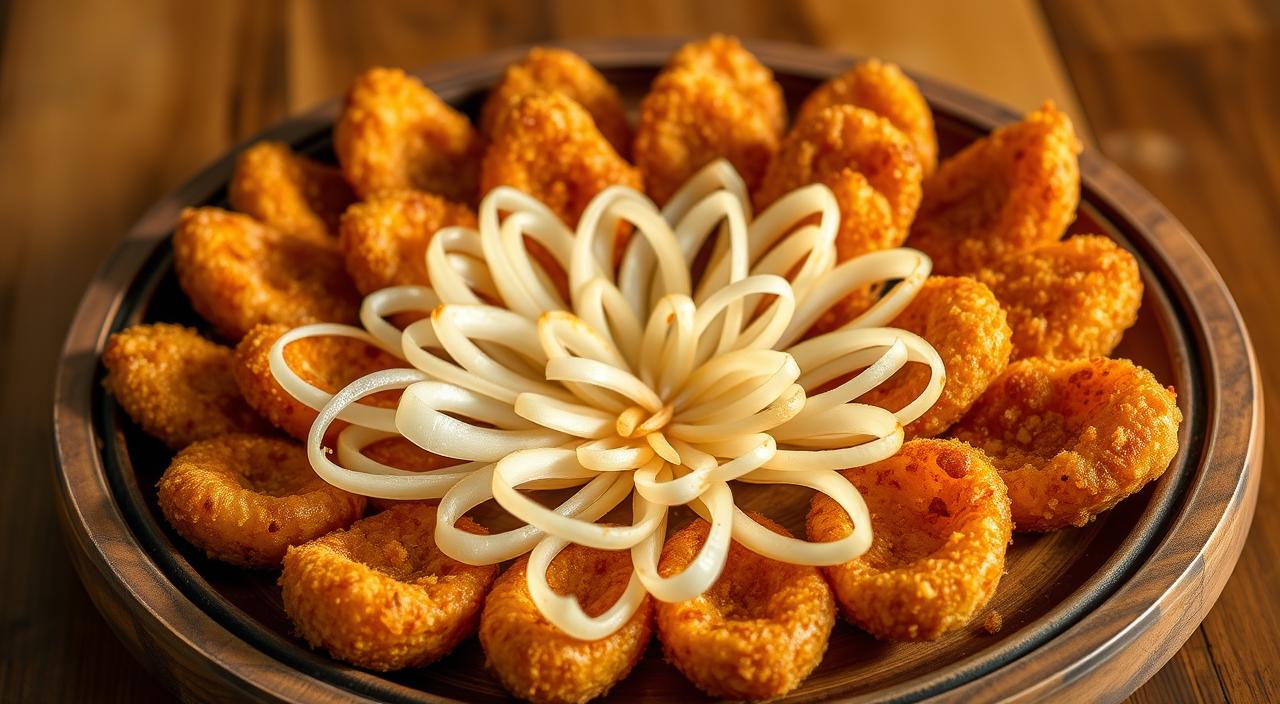
Awesome Blossom Onion Bites: A Tasty Treat
Ever wanted that famous appetizer from a restaurant but in a smaller size? We’ve got you covered! Our bite-sized versions have all the crunch and flavor you love, but in a more manageable size.
Our kitchen team worked hard to perfect these awesome blossom onion bites. They ensure a perfect balance of crispy coating and tender onion inside. The secret is in the batter and oil temperature, which gives that signature crunch we all love.
These treats are great because they’re versatile. Enjoy them at game days, family dinners, or weekend snacks. They go well with many dipping sauces, like spicy mayo or tangy ketchup blends.
In this guide, we’ll show you how to make these crowd-pleasing bites. You’ll learn how to pick the right onions and get that golden-brown finish. Soon, you’ll be serving up bites that everyone will love and want more of.
Key Takeaways
- These bite-sized appetizers offer all the flavor of full-sized blooming onions in a more shareable format
- The perfect batter consistency and oil temperature are crucial for achieving the ideal crunch
- They’re versatile enough for any gathering from game days to family dinners
- You can customize the spice level in both the coating and dipping sauces
- The preparation can be partially done ahead of time for easier entertaining
- They require less oil than traditional blooming onions, making them more practical for home cooking
The Irresistible Appeal of Crispy Onion Appetizers
Crispy onion appetizers are a hit in restaurants. They are golden-brown and seasoned just right. People love the sweet onion taste inside a crunchy coating.
These starters look great and taste even better. A full blooming onion is a showstopper. Bite-sized versions are easy to enjoy and perfect for snacking.
The Restaurant Favorite That Took America by Storm
The blooming onion became famous in the late 1980s. Several restaurants claimed to invent it. It quickly became a must-try dish.
The appetizer became a huge hit for its looks and taste. It was a social media star before social media existed. It made the starter course a main event.
Why Bite-Sized Versions Are Taking Over
Bite-sized versions of the blooming onion are now popular. They offer several benefits:
- Better portion control for health-conscious consumers
- Easier sharing among groups without the mess
- More consistent cooking throughout each piece
- Enhanced dipping capabilities with every bite perfectly coated
These smaller versions let chefs try new flavors and styles. One restaurant owner said,
“The bite-sized versions let us play with flavors in ways the traditional blooming onion never could. Plus, they’re less intimidating for first-timers.”
Home cooks also love making these mini bites. They’re great for any occasion. Their popularity shows no signs of fading.
What Makes Awesome Blossom Onion Bites So Popular
Awesome Blossom Onion Bites are a favorite for many. They offer a perfect mix of texture, taste, and versatility. These small treats have become a hit at all kinds of events, from casual gatherings to fancy parties. So, what makes them so appealing to everyone? Let’s explore the reasons behind their irresistible charm.
The Perfect Combination of Flavors and Textures
The magic of Awesome Blossom Onion Bites is in their contrasting sensory experience. Each bite is crunchy on the outside and soft on the inside. The outside is golden and seasoned, while the inside is sweet and tender.
The cooking process changes the onion’s sharp taste into something sweet. Heat caramelizes the onion’s sugars, making it mild and sweet. The batter adds a golden crust that keeps the onion moist and adds texture.
The seasoning is key to their taste. A mix of spices like paprika, garlic powder, and cayenne adds depth. This blend of flavors is savory, slightly spicy, and sweet, making you want more.
| Texture Element | Flavor Component | Sensory Experience | Appeal Factor |
|---|---|---|---|
| Crispy Exterior | Seasoned Batter | Satisfying Crunch | Immediate Gratification |
| Tender Interior | Caramelized Onion | Melt-in-mouth Softness | Surprising Sweetness |
| Varied Mouthfeel | Spice Blend | Textural Contrast | Flavor Complexity |
| Bite-sized Format | Concentrated Flavor | Perfect Portion Control | Shareability Factor |
An Appetizer for Any Occasion
Awesome Blossom Onion Bites are versatile and fit any event. They’re great for casual gatherings, needing no utensils or plates. They’re also perfect for family gatherings, appealing to both kids and adults.
At holiday parties, they offer a refreshing twist to traditional appetizers. They’re festive and special. Even at formal events, they impress when served elegantly with artfully arranged dipping sauces.
These bites pair well with many drinks, from beer to wine. Their adaptability makes them a hit at any event, with everyone enjoying them. They’re the ultimate crowd-pleaser, perfect for any occasion.
Essential Ingredients for Perfect Awesome Blossom Onion Bites
Creating Awesome Blossom Onion Bites at home starts with quality ingredients. Each part must complement the others in taste and texture. This ensures your dish tastes like it’s from a restaurant.
Selecting the Right Onions
The onion is the main ingredient, so picking the right one is key. Not all onions will give you that perfect sweet and savory flavor when fried.
Look for onions with natural sugars for caramelization. They should also keep their shape when battered and fried.
Sweet onions like Vidalia or Walla Walla are top picks. They have a milder flavor when fried. Yellow onions offer a sweet and sharp taste. White onions have a cleaner flavor that works well with seasonings.
| Onion Type | Flavor Profile | Best Used For | Cooking Characteristics |
|---|---|---|---|
| Sweet (Vidalia, Walla Walla) | Mild, naturally sweet | Traditional restaurant-style bites | Caramelizes beautifully, tender texture |
| Yellow | Balanced sweetness with slight sharpness | All-purpose option | Holds shape well, good flavor development |
| White | Clean, more pungent | Stronger flavor preference | Crisp texture, stands up to bold seasonings |
Size and Freshness Considerations
Medium-sized onions (about 3-4 inches in diameter) are best for bite-sized portions. Choose onions that are heavy for their size with dry, papery skins. Fresh onions have the right moisture for tender interiors and crispy exteriors.
When cutting, make pieces about 1-inch thick. This ensures they cook evenly and keep their shape. Consistent sizes help with even cooking.
The Perfect Batter Components
The batter turns simple onion pieces into crispy, golden bites. To make the perfect batter, balance several ingredients:
Start with all-purpose flour for structure. Add cornstarch (about 1 part to 3 parts flour) for extra crispiness. This combo gives you that light, shatteringly crisp exterior.
Leavening agents like baking powder (about 1 teaspoon per cup of flour) create air bubbles. These bubbles expand during frying, making the coating lighter. Use ice-cold beer or seltzer water for a lighter texture. Buttermilk adds tanginess and helps the coating stick better.
Keep your batter cold! Cold batter sticks better to the onions and results in a crisper coating when fried.
Seasoning Secrets for Maximum Flavor
The seasoning blend makes basic fried onions into Awesome Blossom Onion Bites. Our signature mix balances several spices for that authentic taste:
Start with paprika (about 1-2 tablespoons) for color and mild pepper flavor. Add garlic powder and onion powder (1 teaspoon each) to enhance the savory notes. For heat, use cayenne pepper (¼-½ teaspoon) and black pepper (½ teaspoon).
Don’t forget salt—about 1 teaspoon per batch—to enhance all flavors. Add a touch of dried oregano and thyme (¼ teaspoon each) for depth. Some chefs add a pinch of sugar to promote browning and balance the savory elements.
Season both the batter and the flour coating for maximum flavor. Adjust the heat level by changing the cayenne pepper amount to your liking.
Kitchen Tools and Equipment You’ll Need
Creating onion bites that look and taste like they’re from a restaurant is all about the right tools. Having the right kitchen equipment makes this easy appetizer recipe a breeze. With the right tools, you can turn ordinary onions into treats that everyone will love.
Your kitchen tools are like the supporting cast that makes your appetizer shine. Each tool has a specific role in making your Awesome Blossom Onion Bites perfect. Let’s look at what you’ll need to start.
Essential Tools for Preparation
A sharp chef’s knife is key when making onion bites. A sharp knife means cleaner cuts, so your onion stays intact. You’ll also need a sturdy cutting board that won’t slip.
You’ll need several mixing bowls for different parts of the recipe. Use glass or stainless steel bowls to avoid odors and stains.
Measuring cups and spoons are crucial for following the recipe. Tongs or a spider strainer help with safely moving onion pieces in and out of hot oil. A kitchen thermometer is essential for keeping the oil at the right temperature.
A mandoline slicer is handy for uniform onion pieces. It’s not necessary but makes your appetizer look professional.
Cooking Equipment Options
Once your onion bites are ready, you need the right equipment for cooking. The cooking method affects the texture and flavor of your appetizer.
Deep-frying is traditional and authentic, but it’s not for everyone. Luckily, there are healthier alternatives that still taste great.
Deep Fryer vs. Dutch Oven
A dedicated deep fryer offers precise temperature control and safety features. It’s perfect for frequent frying and ensures a perfect golden exterior.
If you don’t have a deep fryer, a heavy-bottomed Dutch oven or deep pot works well. They retain heat well and prevent oil splatter. Always use a thermometer and don’t overfill the pot with oil.
Air Fryer and Oven Alternatives
Air fryers can make crispy onion bites with just a little oil. Set your air fryer to 375°F and cook in batches for 8-10 minutes, shaking halfway.
Ovens can also make delicious onion bites. Arrange battered onion pieces on an oiled baking sheet and bake at 425°F for 15-20 minutes. These methods are healthier and less messy than deep-frying.
Preparing Your Onions: The First Steps
Before you start frying, you need to prepare your onions. This is the first step to making Awesome Blossom Onion Bites. Cutting, soaking, and drying onions right impacts their taste, texture, and crunch. Let’s go through each step to make your onion bites as good as any restaurant’s.
Cutting Techniques for Perfect Bite-Sized Pieces
Professional-looking Awesome Blossom Onion Bites start with your knife skills. Use medium to large yellow onions for the best taste and structure. Peel the onions and cut each into quarters through the root end.
For “petal-style” bites, cut each quarter horizontally to get 1-inch segments. These will fan out nicely when fried. Make sure your cuts are even so all pieces cook the same.
For a blooming look, cut the onion in half and then make vertical cuts from the top down. Stop about ½ inch from the bottom. This keeps the onion’s structure while making it easy to cook evenly.Pro tip: Angle your knife for wider “petals” at the top and narrower connections at the base. This makes your onion bites bloom more when they hit the hot oil.
Pre-Soaking Methods for Extra Crispiness
Soaking your onions is a key step many home cooks miss. A 30-60 minute soak in ice-cold water removes sulfur compounds. This makes the onions milder and crisper when fried.
For extra crunch, try soaking in buttermilk. The acids in buttermilk tenderize the onion and add tanginess. Just soak your cut onions in buttermilk for at least 30 minutes.
| Soaking Method | Time Required | Benefits | Best For |
|---|---|---|---|
| Ice Water | 30-60 minutes | Reduces sharpness, maintains crispness | Milder flavor profile |
| Buttermilk | 30+ minutes | Tenderizes, adds tanginess | Extra crispy texture |
| Milk + Ice | 45 minutes | Balances sweetness, prevents wilting | All-purpose option |
Drying and Preparing for Battering
After soaking, dry your onions well. Wet onions can splatter oil and prevent batter from sticking. Drain them in a colander and pat dry with paper towels or towels.
Let the onions dry at room temperature before battering. Cold onions can make the oil too cool, leading to soggy bites. We want crispy fried onions.
Lightly dust your dried onions with flour before battering. This helps the batter stick, giving you that crunchy exterior we all love.
Creating the Perfect Batter and Coating
Turning ordinary onions into Awesome Blossom Onion Bites is all about the batter and coating. This process transforms simple onion pieces into a delicious appetizer that rivals any restaurant. Our copycat recipe ensures a crispy exterior and tender, flavorful onion inside.
The batter and coating work together. The wet batter adds flavor and sticks to the onion. The dry coating gives that unmistakable crunch. When done right, they create a perfect texture contrast that makes these bites addictive.
Wet Batter Ingredients and Mixing
The wet batter starts with flour for structure. Cornstarch is added for a light, crispy texture that shatters when bitten.

Eggs bind the batter together. You can use milk, buttermilk, or beer for the liquid. Milk gives a traditional flavor, buttermilk adds tanginess, and beer adds a malty depth.
The seasoning blend elevates our copycat recipe to restaurant quality. We mix:
- Paprika for color and mild flavor
- Garlic powder for savory depth
- Onion powder to enhance the natural onion flavor
- Cayenne pepper for a gentle heat that balances the sweetness
Remember, less is more when mixing. Stir until just combined. The batter should be thick enough to cling to the onion but still fluid.
Dry Coating Options for Extra Crunch
The dry coating adds that satisfying crunch. We recommend a mix of flour and cornstarch with the same seasoning blend used in the wet batter.
For different textures, try these alternatives:
- Add cornmeal for a more substantial, granular crunch
- Mix in panko breadcrumbs for an extra-crispy Japanese-inspired coating
- Incorporate crushed crackers or potato chips for unique flavor notes
The dredging technique is key for maximum crunch. Dust the onion pieces in the dry mixture, then dip in wet batter, and coat again in the dry mixture. This creates multiple layers for that perfect crispy exterior.
“The secret to restaurant-quality onion bites is in the double-dredge technique. That extra step makes all the difference between good and great.”
Use a fork or tongs to handle coated pieces to prevent gummy coating. Arrange them on a wire rack with minimal touching before cooking. This prevents sticking and maintains the perfect coating.
Step-by-Step Cooking Instructions for Awesome Blossom Onion Bites
Making awesome blossom onion bites is all about the cooking. Simple ingredients turn into irresistible appetizers. Follow our easy steps to impress your guests with restaurant-quality bites.
Battering Technique for Even Coverage
Getting the batter right is key for that perfect crunch. Use the “wet hand, dry hand” method for neat and effective coverage.
Use one hand for wet ingredients and the other for dry. Dip onions in wet batter, letting excess drip off. Then, coat them in seasoned flour with your dry hand, pressing gently.
For extra crunch, try double-dipping. Coat, then wet, then coat again. Place coated pieces on a parchment-lined tray, keeping them apart to prevent sticking.
Deep Frying to Golden Perfection
Deep frying gives those bloomin onion bites a restaurant-style texture and flavor. It creates a crispy outside and a tender inside.
Keeping the oil at the right temperature is absolutely critical. Heat it to 350-375°F (175-190°C). This ensures a quick seal without burning the outside before the inside cooks.
Always use a candy or deep-fry thermometer for accuracy. When adding food, the temperature drops. Adjust your heat to keep it in the ideal range.
Batch Size and Timing
The size of your batches affects both oil temperature and quality. Fry in small batches, about 6-8 pieces at a time, to avoid overcrowding.
Each batch takes 2-3 minutes to get golden brown. They’re done when they float and look rich and golden. Remove with a slotted spoon and drain on paper towels.
Alternative Cooking Methods
Not everyone wants to deep fry. We’ve got two great alternatives that use less oil.
Air Fryer Instructions
The air fryer makes crispy bloomin onion bites with less oil. Preheat to 375°F (190°C) and lightly spray the battered onions with oil.
Put them in a single layer in the air fryer basket, without overcrowding. Cook for 8-10 minutes, shaking halfway. You’ll need to do batches, but it’s worth it!
Oven-Baked Version
Oven baking is a hands-off way for bigger batches. Preheat to 425°F (220°C) and place battered onions on a parchment-lined sheet, sprayed with oil.
Bake for 15-20 minutes, flipping halfway, until golden and crispy. This method is healthier and perfect for big groups.
| Cooking Method | Cooking Time | Oil Usage | Crispiness Level | Best For |
|---|---|---|---|---|
| Deep Frying | 2-3 minutes | High | Maximum | Authentic restaurant taste |
| Air Fryer | 8-10 minutes | Very Low | High | Health-conscious eaters |
| Oven Baking | 15-20 minutes | Low | Medium | Large batches |
Signature Dipping Sauces
The Awesome Blossom Onion Bites are amazing, but the dipping sauces make them unforgettable. We’ve created several sauces that match the sweet onion flavor and crunchy coating. Your homemade version will be just as good as any restaurant’s.
Classic Awesome Blossom Sauce Recipe
The famous sauce is creamy, tangy, and spicy. Our homemade version has a simple base with complex flavors.
To make this classic dipping sauce, start with 1/2 cup mayonnaise and 2 tablespoons ketchup. Add 2 teaspoons of horseradish for a kick. A teaspoon of Worcestershire sauce adds depth.
Season with 1/4 teaspoon garlic powder, paprika, and a pinch of cayenne pepper. Let the sauce sit for at least an hour before serving. It gets better in the fridge for up to a week!
Spicy Alternatives
For those who like it hot, we have spicy options. Our Sriracha Aioli has 1/2 cup mayonnaise, 2 tablespoons Sriracha, lime juice, and honey. It’s a balanced heat that grows with each bite.
Our Chipotle Ranch is another favorite. It mixes 1-2 tablespoons of chipotle peppers with 1/2 cup ranch. It’s smoky and medium-heat.
For the hottest option, try our Habanero Honey dip. It balances 1 minced habanero pepper with honey and sour cream. You can adjust the heat to your liking.
Creamy and Sweet Options
We also have milder sauces for those who prefer less heat. Our Honey Mustard has Dijon mustard, honey, mayonnaise, and apple cider vinegar. It’s tangy-sweet and highlights the onion’s flavor.
Our Garlic Parmesan dip is creamy and savory. It’s made with sour cream, Parmesan cheese, roasted garlic, and herbs. It’s a sophisticated choice for your appetizer spread.
Sweet BBQ sauce adds a smoky-sweet flavor. Mix 1/3 cup barbecue sauce with honey and liquid smoke. It’s perfect for those who love traditional barbecue flavors.
Serving Suggestions and Presentation Ideas
Serving Awesome Blossom Onion Bites is more than just cooking them right. It’s about making a feast for the eyes that makes them even more appealing. We’ve got our top tips and ideas to make these crispy treats shine.
Creative Plating Techniques
For a casual vibe, serve them in a paper-lined basket or cone. It’s like a pub-style snack that invites sharing and chat. For a fancier look, arrange them in a spiral on a round platter with dipping sauces around.
Try serving them in a martini glass or on a tiered stand for a wow factor. It’s perfect for cocktail parties or special events. For fun, give each guest their own in mini fryer baskets or paper bags.

Garnishes can make a big difference. A sprinkle of parsley, chives, or paprika adds color and freshness. For a special touch, arrange them like a blooming onion.
Perfect Pairings and Menu Ideas
These onion bites go great with drinks. Beer, especially amber ales or lagers, pairs well. For wine lovers, a crisp Sauvignon Blanc or sparkling wine is perfect.
Balance warm, fried bites with fresh items. Try vegetable platters, cheese boards, or cold dips. You can also have themed menus like “Pub Favorites” or “International Bites.”
At cocktail hour, pair them with drinks like Margaritas or Moscow Mules. These drinks offer a nice contrast to the savory bites.
Making It a Complete Meal
These onion bites are great as an appetizer or part of a full meal. Pair them with grilled burgers or sandwiches and a salad for a balanced dinner. They add a fun twist to a familiar meal.
They’re also a tasty side for steaks or grilled chicken, a better choice than onion rings. Their small size makes them easy to enjoy with your main dish.
“The secret to a satisfying meal is contrast—something crispy, something fresh, something hearty. These onion bites provide the perfect crispy element to round out any dinner.”
For a lighter meal, top a hearty salad with them or serve them with a robust soup. The key is to balance the fried onions with fresh, light elements. This versatile appetizer can fit into almost any menu with a bit of creativity.
Troubleshooting and Expert Tips
Making crispy fried onions at home can be tricky. But with the right advice, you can make Awesome Blossom Onion Bites perfectly every time. Follow these tips to make this easy appetizer a hit with your guests.
Common Problems and Solutions
Even with careful following of the recipe, you might face some challenges. Here are the most common problems and how to fix them quickly.
Batter Not Sticking
Moisture is often the reason why the batter doesn’t stick. Always pat your onions dry after soaking them. Dust the onions with flour before dipping in batter for better sticking.
If your batter is too thin, add more flour slowly. Chilling your battered onions for 15 minutes before frying helps the coating stick better.
Uneven Cooking
Uneven cooking usually happens because of different onion sizes. Make sure to cut your onions the same size for even cooking. Don’t overcrowd your cooking vessel, as it can cool the oil down.
Use tongs to gently separate any sticking pieces during frying. If some pieces brown faster, take them out first and cook the rest until they’re golden brown.
Keeping the oil at the right temperature is key for crispy onions. Too cold, and they soak up too much oil. Too hot, and they burn on the outside. Use a good deep-fry thermometer to keep the temperature right. Let the oil heat up again between batches, and don’t fry too many pieces at once.
Make-Ahead and Storage Options
This recipe gets even easier with make-ahead options. You can prep the onions up to 24 hours in advance and store them in the fridge.
The dry coating mixture can be made a few days ahead and kept at room temperature. The wet batter can be made a few hours before, but you might need to thin it out when it gets cold.
To make things even easier, you can cook the onion bites, cool them, and freeze them. They’ll stay good for up to 3 months and can be reheated from frozen.
Reheating for Maximum Crispiness
Reheating your Awesome Blossom Onion Bites right is key for crispiness. Avoid microwave reheating, as it makes the onions soggy. Instead, try these methods for crispy results:
| Reheating Method | Temperature | Time | Special Instructions | Crispiness Rating |
|---|---|---|---|---|
| Conventional Oven | 400°F (200°C) | 5-7 minutes | Use a wire rack on baking sheet | Very Good |
| Air Fryer | 375°F (190°C) | 2-3 minutes | Shake basket halfway through | Excellent |
| Toaster Oven | 375°F (190°C) | 4-5 minutes | Place on foil-lined tray | Good |
| Skillet Re-frying | Medium-high heat | 1-2 minutes | Use minimal oil, turn frequently | Very Good |
If reheating from frozen, add a few extra minutes to your method. Serve your crispy fried onions immediately for the best taste and texture. With these tips, your onions will impress everyone!
Conclusion
We’ve covered everything about making perfect awesome blossom onion bites. These crispy, tasty treats bring a restaurant feel to your kitchen. Their small size makes them great for any occasion.
These onion bites are loved for their flexibility. You can change the spice level or try different dips. You can even air fry them for a healthier option. The choices are endless!
Don’t get discouraged if your first batch isn’t perfect. Cooking skills improve with practice. The tips we shared will help you fix common problems and get better with each try.
Quality ingredients and careful preparation are key to amazing onion bites. Spend time on cutting and battering. It’s worth it for the final taste.
We hope this guide encourages you to make these tasty bites for your next event. They’re perfect for game day, family dinners, or casual parties. They’re sure to be a hit. Happy cooking!
FAQ
What type of onions work best for Awesome Blossom Onion Bites?
Sweet onions like Vidalia or Walla Walla are great because they taste milder and caramelize well. Yellow onions also work well, with a sweet taste and a bit of sharpness. Choose medium-sized onions that are firm and have no soft spots or sprouts.
Can I make Awesome Blossom Onion Bites ahead of time?
Yes! You can prep the onions up to 24 hours in advance and keep them in the fridge. The dry coating mixture can be made days ahead, and the wet batter a few hours before. You can even cook them, cool them down, and freeze them for up to 3 months.
How do I keep my batter from falling off the onions?
To keep the batter on, dry the onions well after soaking, then dust them with flour before dipping. Your batter should be like pancake batter. Chilling the battered onions for 15-20 minutes before frying helps the coating stick better.
Can I make these onion bites without deep frying?
Yes! You can use an air fryer or oven instead of deep frying. For air frying, preheat to 375°F, spray with oil, and cook for 8-10 minutes. For oven baking, preheat to 425°F and bake for 15-20 minutes, flipping halfway.
What’s in the classic Awesome Blossom dipping sauce?
The classic sauce has mayonnaise, ketchup, and horseradish for a kick. Worcestershire sauce adds depth, and garlic powder, paprika, and cayenne round out the flavor. Make it at least an hour before serving for the best taste.
How do I reheat leftover onion bites while keeping them crispy?
Avoid microwaving as it makes them soggy. Instead, preheat your oven to 400°F and bake for 5-7 minutes. Air fryers are great for reheating, needing just 2-3 minutes at 375°F. If frozen, add a few extra minutes.
Why should I soak the onions before battering them?
Soaking the onions in cold water for 30-60 minutes removes some sugars and sharp compounds. This makes them taste milder and crispier when fried. Our buttermilk soaking method tenderizes the onion and adds tanginess. Adding ice keeps the onion crisp.
What’s the best oil to use for frying these bloomin onion bites?
Use a neutral oil like vegetable, canola, or peanut oil. These oils handle high frying temperatures without breaking down or adding unwanted flavors. Peanut oil is tasty but may not be good for those with allergies.
How do I know when my oil is at the right temperature for frying?
The ideal temperature is 350-375°F. A candy or deep-fry thermometer is the best way to check. If you don’t have one, test by dropping batter into the oil. It should sizzle and float to the surface, browning slowly.
Can I make these onion bites gluten-free?
Yes! Just use a gluten-free flour blend in the batter and coating. Many gluten-free flours are a 1:1 replacement. You might need to adjust the liquid. Also, make sure any seasonings or sauces are gluten-free.